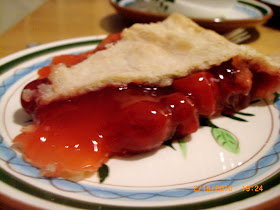
It’s a classic. And it’s quintessentially February – the vibrant
red, the flavor reminiscent of the tree George Washington chopped down (President’s
Day), the sweet taste with a slight tang. Our first February pie of the month
in 2010 was a cherry pie!
I had never eaten a homemade cherry pie before, much less made
one myself. But since first making this delectable dessert, we have definitely
repeated it. It’s become a sort of President’s Day tradition now, and we’ve
made it for birthdays too. It is fairly simple to make, and you just can’t beat
the taste!
We used simple cans of cherries… someday I would like to pit my own cherries and make it totally from scratch, but we’ll save that for someday when I have more time.
This is what the cherries look like while they’re cooking and
thickening on the stovetop – what a swirling mass of beauty!
I am going to be sharing our pie crust recipe on another post
soon, but pre-made crusts are also acceptable. This pie crust was homemade,
however, and tasted amazing!
Since this was our first time making this pie, we didn't realize how important it was to let the pie cool so the filling would thicken. It was a little soupy this time, but now we usually allow at least an hour or two for it to thicken before we enjoy it.
Well, without further ado, here are the instructions for how
to make it! Unfortunately, I have no idea where the recipe is from. If you recognize
it, please let me know so I can give proper credit. We love it!
Cherry Pie
½ - ¾ cups of sugar (or more, if desired)
3 tbsp. cornstarch
2 cans (21 oz. each) of red tart cherries
¼ tsp. almond extract
1 tbsp. butter (if desired)
- Preheat oven to 400 degrees. Drain the cherries and reserve juice from only one can.
- In a saucepan, stir the cherry juice into the combined mixture of cornstarch and sugar. Cook over medium heat, stirring constantly until thickened.
- Remove from heat. Gently stir in cherries and almond extract.
- Pour filling into pastry-lined pan. Dot with butter. Adjust top crust, seal, and vent.
- Bake 30-40 minutes or until crust browns and filling begins to bubble. If necessary, cover edges of pie crust with aluminum foil during the last 15 minutes to prevent over-browning.
- Cool pie for several hours to allow filling to thicken before slicing.


No comments:
Post a Comment