After September’s circles and October’s squares, we were ready
to learn about triangles in November! The art project we did for our portfolio
was a 2-step process, and boy was it interesting!
Before I write anything else, please read my explanation of "shape of the month." It's not a rigid curriculum or one art project - after our conversations about triangles, the toddlers surprised me by pointing out the triangle in the parking lot on our way to the playground!
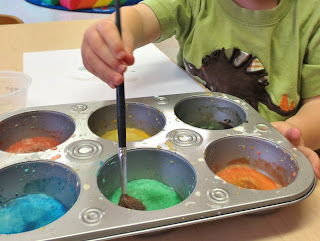
It all began because I found this recipe for homemade watercolors and decided to give it a whirl.
It all began because I found this recipe for homemade watercolors and decided to give it a whirl.
We had so much fun! The muffin tins were a good idea,
especially for toddlers, but I did let them use some smaller paintbrushes for a
challenge. (Younger toddlers would probably do well with short, chubby
paintbrushes – easier to grip. My students were 20-26 months old when we did
this.)
Check out these grips! What great practice for writing and
lots of other life skills.
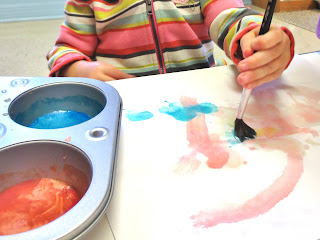
They swirled the paint all around their paper, creating
beautiful pictures!
We used a recycled applesauce cup with a VERY small amount of
water in the bottom for the children to “activate” the paint.
They enjoyed experimenting with the paintbrushes, smooshing
them down, dragging them across the paper, swirling, and more.
Unfortunately, the colors didn’t stay this vibrant when they
dried. But the great thing was that November’s color of the month was brown,
and all those watercolors blended together to make… you guessed it – brown!
Of course, color mixing happened. They loved touching the hard
surfaces of the paints and swirling the paintbrush around each of the muffin
cups one right after another.
But with supervision, a little encouragement, and positive
reinforcement, the watercolors did not get too mixed together – more chances of
reusing the paint!
I didn’t take too many pictures of the next step, but it
involves the teacher (or some older children) cutting the paintings into triangles
of all different sizes. Of course, use the parts of the paintings that contain
the best colors!
The next day, I set out contact paper (sticky side up, taped
onto the table) and let the children stick the triangles (color side DOWN) on
the contact paper. Of course, this prompted much experimentation with the
sticky contact paper and conversations about triangles!
Make sure there is enough space between the triangles – the final
step is placing a piece of white paper on top of it all, then turning everything
over. You want to make sure enough contact paper is accessible for the paper to stick to it, but the triangles will be very visible on the white background! Fold the
excess contact paper over the edges of the paper (or trim them) and add an
explanation with a Sharpie if desired.
After being on display for a week or so, these masterpieces found their way into our portfolios. Stay tuned for more monthly shapes - sorry, I'm just now catching up!


What a great idea, so creative! Love it! Thanks for sharing!
ReplyDeleteI would like to invite you to my linky party Thrifty Thursday!
appleofmamaseye.blogspot.com
Hope to see you there!
-Lindsey