It’s almost the 4th of July, Independence Day in
the United States! We have been having a lot of fun with red, white, and blue to
celebrate!
This is actually the second year in a row that I’ve made this with my toddler classes, and FUN FACT: It’s the first project that I saw on Pinterest and actually completed! This is where the idea is originally from.
Both times it has turned out beautifully, and although there
is some adult assembly required, the kids’ fingerpainting shines through, and
the finished product looks great as a decoration for any patriotic holiday.
It could also be fun for Christmas (just do red and green
instead of red and blue) or just as an introduction or reinforcement of the
star shape.
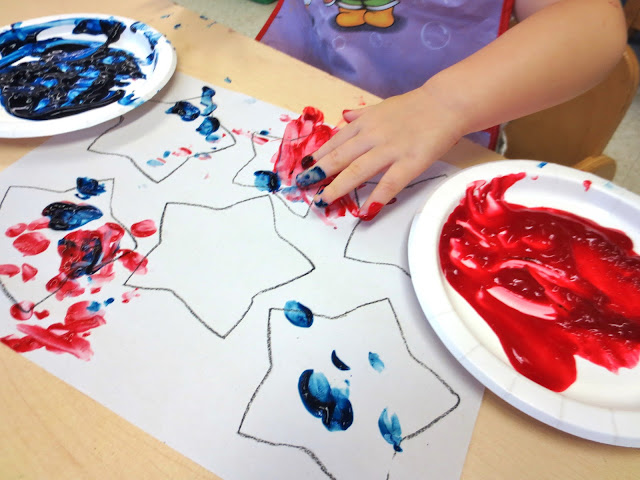
Anyway, the first step is for the teacher to draw some stars
on a white piece of paper. I used this cookie cutter and a crayon so that the
paint wouldn’t run like it would if I’d used a marker.
Next comes the fun part… FINGERPAINT!!!
I had dotters…
…and smearers…
…and those who made handprints!
But they all enjoyed the sensory experience.
And of course, we talked about the colors they were painting
with!
I tried to fit as many stars on the page as I could so that
their artwork would end up being used rather than discarded on the scraps. (With
this star cookie cutter, I ended up with 6-8, but you could also fill in blank
spaces with a smaller star stencil and use up even more space.)
After the paint dries, cut out the stars – the leftover paper is
like a work of art in itself!
The next step is to mount them on red, white, and blue construction paper. (I
tried to use contrasting colors from the primary color of paint on each star.)
Then cut them out of the construction paper and admire their
beauty!
Next, line them up in the order you want them to be in and poke
2 holes in each star with a paper clip.
Then thread the string or ribbon through the stars!
Hang them up in the classroom, point to them often, and talk
about them with the kids!


No comments:
Post a Comment